Thai Vegetable Salad

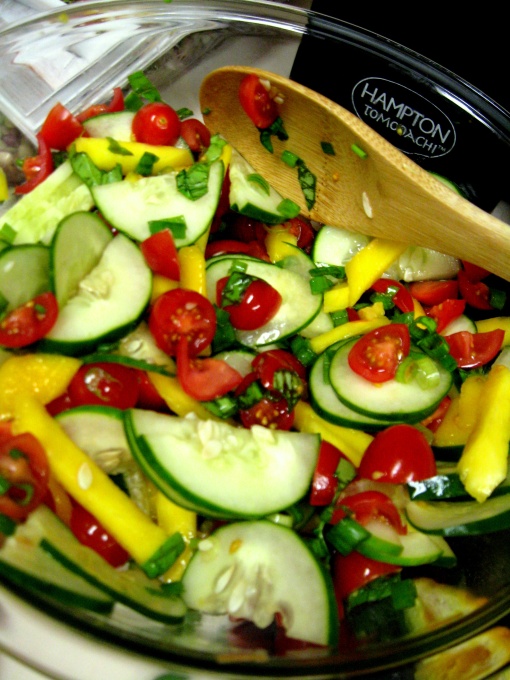
Summer is the perfect time for easy-to-make, crispy, refreshing salads. This Thai vegetable salad is all three. It’s also extremely simple to adapt and vary to your liking, which is one of my favorite characteristics of any recipe.

And I love the cookbook this recipe came from. During my last semester of college I went on a bit of a vegetable-happy, anti-meat kick (for a variety of reasons not really interesting enough to share). So for my birthday back in February, my bacon-loving, but ever-understanding (and willing to eat tofu!) boyfriend gave me this cookbook, “200 Veggie Feasts.” It’s a conveniently sized little book FULL of beautiful, mouth-watering photos. It has a wide variety of recipes too, from breakfast and brunch foods to soups, breads, and desserts. It’s one of those cookbooks that has me drooling over the delectable items on every page and wishing I had the time to make every single recipe. Right after I first got the book I even dreamed about the haloumi cheese with pomegranate salsa and couldn’t get the crostini with pea and ricotta pesto off my mind. I’m very pleased to have added it to my small, but growing cookbook collection.

I didn’t have the Lebanese cucumber or Thai basil that the original recipe called for, but it still had the wonderful flavors of a Thai dish–a dash of spice, tangy lime, fresh basil, and peanuts, just to name a few. I used a regular cucumber and basil, omitted the additional herbs and bean sprouts (listed as optional ingredients in the recipe below), and simplified the dressing a bit, but the whole thing still tasted great. A good salad is the perfect choice for a lazy summer day, and this one is definitely a keeper.

Thai Vegetable Salad

Recipe adapted from 200 Veggie Feasts by Louise Pickford

8 oz cherry or grape tomatoes, quartered
1 cucumber, thinly sliced
1 mango, cubed or thinly sliced
4 scallions, thinly sliced
handful unsalted peanuts, roughly chopped
small handful basil leaves (about 5-7 leaves), finely sliced
small handful mint leaves, finely sliced (optional)
small handful cilantro, finely sliced (optional)
2 1/2 c. bean sprouts (optional)

Dressing
2 Tbsp chili garlic sauce (or another chili sauce you like)
2 Tbsp soy sauce
2 Tbsp lime juice
4 tsp  brown sugar

Make the dressing by adding all ingredients to a small bowl and whisking until combined. Taste and adjust ingredients as needed.

Prepare salad ingredients and combine in a large bowl. Toss well with dressing (or serve dressing on the side if desired) and garnish with chopped peanuts.

Buttermilk Squash Soup

I was a bit horrified when I signed in to my blog today and realized that it’s been over a month since I last posted. I’m very sorry for the long absence. More than anything I’m sitting here wondering how an entire month has passed so quickly. I’ve spent the last several weeks loving and savoring every leaf, apple pie, and sunny day of a beautiful fall: crunching dry leaves under my feet as I walk to class, appreciating the truly incredible range of reds, yellows, and oranges dangling from every tree I pass, carving pumpkins with friends, visiting a corn maze for the first time, picking Concord grapes in my yard with my family, making grape juice from those grapes, baking apple pie, celebrating an absurd number of friends’ fall birthdays (which meant lots of chocolate and lots of pies), and most importantly, trying to find a few moments to do that thing that I started writing this blog for in the first place: cook!

And I have done quite a bit of cooking in the last month and I’ve discovered several great new recipes. I’ve just been slacking in the writing about and sharing recipes department. But now fall is on its way out, barren trees and frost-covered grass greet me each morning, so I’m saying goodbye to my colorful autumn-kissed days and returning to my blog with a new commitment to try very hard to post regularly. Besides, Thanksgiving and the promise of one lovely school-free week are just around the corner, which seems like an excellent time to start writing about food again.

One of the highlights of my cooking endeavors this last month was this squash soup. It was inspired by the mammoth squashes that a friend gave me; I’d never seen such big squashes in my life (see photo below). They were summer squash, very similar to a zucchini, and they made a very nice soup. I imagine that butternut squash or other types of fall/winter squashes could easily be substituted into this recipe. This is also a recipe that begs for creativity, variation, and substitution. I’ve made this soup twice and each time I made subtle variations, both of which were delicious. The amounts given here are just a guideline, it really depends on your preferences. I had no idea how much my squash weighed, so I just used this recipe as a guideline and went for it, tasting every step of the way.

I added Yukon gold potatoes, which were a nice buttery addition, and mostly used rosemary, garlic, and paprika to flavor the soup. Again, tasting the soup many times is very important. So here is my rough guideline to making a delicious squash soup, one last celebration of fall.

Buttermilk Squash Soup

Recipe adapted from 101 Cookbooks

olive oil
2-3 shallots, chopped
pinch of salt
pinch or two crushed red pepper flakes to taste
1 sprig of rosemary or ~1 tsp. dried rosemary
1 1/2 lbs (approx.) yellow summer squash, chopped into ~1 inch cubes/pieces
2 medium or 3 small potatoes, chopped into ~1 inch cubes/pieces
3 cloves garlic, pressed
black pepper to taste
paprika to taste (start with 1 tsp and go from there)
3 cups vegetable stock or water
2/3 cup buttermilk

In a large pot over medium heat a splash of olive oil. Add the chopped shallots, red pepper flakes, and fresh or dried rosemary, sauteeing until the shallots are tender. Then add the squash and potatoes pieces and cook for about 5 minutes until the squash starts getting tender.

Add the pressed garlic and remove the sprig of rosemary if using fresh. Next add the vegetable stock or water. Bring this to a boil, then reduce to a simmer and simmer for 15-20 minutes, until the potatoes are tender. While the soup is simmering, stir occasionally, taste and adjust seasonings.

When the potatoes are tender, puree the soup with an immersion blender or transfer to a regular blender and puree. Whisk in the buttermilk and taste the soup, adjusting the seasonings (I found I needed more salt and paprika at this point). Serve and enjoy!

Skillet Tamale Pie

In the middle of a busy week, I was pleasantly reminded of how great cooking is at reducing stress. One morning I woke up dazed from a restless night of strange dreams: after falling asleep reviewing how blood circulates through the heart (the result of an intense night spent studying for the GRE subject test in Biology), I dreamed about never-ending pages of confusing words and numbers that didn’t make any sense (reminiscent of my statistics textbook) that I was trying to memorize. Talk about stressful.

The next morning was dreary and gray and I felt a little down all morning. But at lunch time I had an extra hour at home before class and I decided to make a stir-fry for lunch instead of heating up leftovers like usual. It was really mostly to avoid more studying, I never thought about it improving my mood. As soon as I started peeling carrots I began to relax. Lingering worries about classes and the GRE triggered by those strange dreams drifted to the back of my mind and I concentrated only on chopping. It was very therapeutic. I relished the smells of soy sauce, freshly grated ginger, minced garlic, and rice vinegar while mixing up a sauce for my vegetables. Consciously deciding to take the time to make lunch that day, instead of trying to cram in a little reading for class, was probably one of the better decisions I made for myself all week. It was a much needed brain break from reality, something that I need to remember to do more often when things are getting a little stressful.


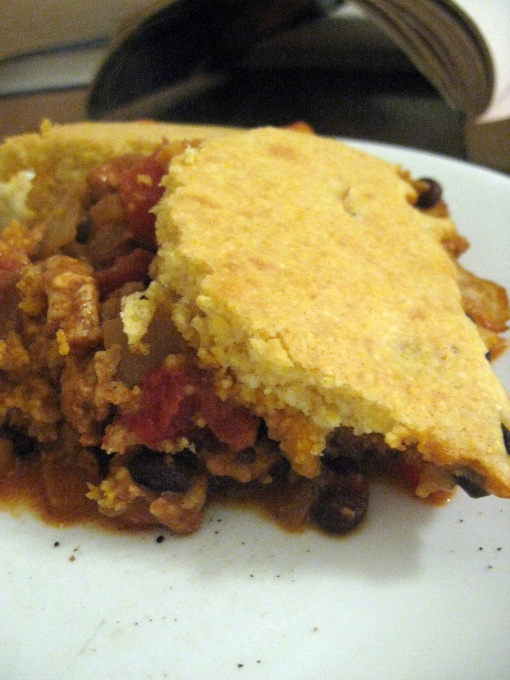
And this skillet tamale pie is a tasty, easy-to-make comfort food for busy times. This is a great recipe that I learned in high school when I took a class called Gourmet Cooking. It was one of my favorite classes in high school–we got to spend every class period learning food preparation techniques and cooking delicious food, so naturally I loved it. The only problem with this recipe is that I’m not crazy about the name. It’s not especially tamale-like and it’s not very pie-like. It’s actually not much like anything else, which is why I couldn’t come up with a better name. Any suggestions would be appreciated :)

Anyway, I dug out my binder of recipes from Gourmet Cooking this summer, specifically looking for this tamale pie recipe because I knew my housemates would love it. It’s another one of those dishes that fed me for several days in a row, which is always a bonus when you’re in college. It’s easy to substitute or omit ingredients; for example, the other week I made it without cilantro and I think a handful of frozen corn would be a great addition.


Skillet Tamale Pie

Recipe adapted from America’s Test Kitchen

Filling

1 onion, minced
2 – 2 1/2 Tbsp chili powder
2 cloves of garlic, minced or pressed
1 lb ground beef or turkey
1 15 oz can black beans, drained
1 14.5 oz can diced tomatoes, drained
1 c. shredded cheddar cheese
2 Tbsp fresh cilantro, minced (optional)
~ 1/2 c./one handful of frozen corn (optional)
salt and pepper to taste

Topping

3/4 c. all-purpose flour
3/4 c. yellow cornmeal
3 Tbsp sugar
3/4 tsp baking powder
1/4 tsp baking soda
3/4 tsp salt
3/4 c. buttermilk or regular milk
1 egg
3 Tbsp butter, melted

Preheat the oven to 450.

Heat a tablespoon or two of oil in a large skillet on medium heat. Saute the onion, chili powder, and a little salt until the onion is soft. Then add the minced garlic, stirring for just under a minute to cook the garlic before adding the next ingredients. Add the ground meat, beans, and tomatoes. Simmer for about 5 minutes.

When the meat is thoroughly cooked, stir in the cheese, cilantro, and corn if you’re using it. Season with salt and pepper.

To make the cornbread topping, whisk together the flour, cornmeal, sugar, baking powder, baking soda, and salt. In a different bowl,whisk together the buttermilk or regular milk and egg. Combine the milk and egg mixture with the flour mixture. Then stir in the melted butter.

Spread the cornbread mixture evenly over the filling (which is still in the skillet). Then bake the whole thing for 10-15 minutes, until the cornbread is done in the center.

Roasted Chicken

To celebrate the first day of my last year of college I decided to roast a chicken. It was completely new territory for me. This might be a bit of a silly story to anyone who has prepared countless Thanksgiving turkeys and roasted chickens for Sunday dinners, but it was a big deal for me.

The decision to roast this chicken might have had a lot to do with the fact that it was two days past its “use by” date (since I’d bought it a week earlier and had been carefully avoiding trying to figure out how to cook it) and was taking up a huge amount of space in a fridge that suddenly had to fit five different people’s food (welcome back,  housemates!) and just a little bit to do with the fact that I wanted to celebrate classes starting up again. Either way, it ended up being a good decision.

Let’s go back to the grocery store aisle on that fateful day when my housemate and friend Wing and I decided to purchase an entire chicken. For the first time ever. After a summer of cooking and eating together nearly every day, Wing and I are very efficient grocery shoppers. We make lists and menus and plans and breeze through the store, rarely distracted and only occasionally giving in to temptations like pints of Häagen-Dazs on sale (you have to try their rum raisin ice cream, it is one of the most delicious things I have ever tasted. The combination of rum, raisins, and sweet creamy ice cream is THE BEST). But before checking out, we inevitably end up standing in front of the meat section for a long time. A very long time. I’m not sure what it is about meat that makes it so difficult for us to buy–is it the price? the wide variety of choices? or its unappealing bloody rawness? (I think it’s mostly that last one for me.) We discuss which cuts of chicken to buy (boneless? skinless? thighs or drumsticks?), whether we should go with the free-range, organic variety since it is on sale this week, and how many we should buy, since single pieces of frozen chicken tend to get lost in our black-hole of a freezer, which doesn’t do anyone much good. And that’s just for the chicken section. If we can make a chicken decision within ten minutes we usually just run away as quickly as we can, completely avoiding the red meat.

Anyway, one day as we stood in our regular place contemplating our chicken choices, something possessed me and I reached for a whole chicken. It was an organic, free-range chicken on sale for an excellent price. I couldn’t resist, even though I’d never prepared or roasted an entire bird in my life. It seemed like a time-consuming, challenging task, especially when it’s so easy to buy an already roasted and seasoned rotisserie chicken from the deli. But for some reason I decided right then that I had to roast that chicken. Why not? It can’t be THAT hard, I thought.

Unfortunately my enthusiasm for roasting a chicken pretty much died as soon as the bird was safely stored in the refrigerator. It once again seemed an insurmountable and much too time-consuming task. I half-heartedly flipped through my trusty Betty Crocker cookbook to see how to go about preparing the bird and was dismayed to see the 2 hour estimated roasting time for a 5 pound chicken. So the poor chicken sat for several more days. Until Wing pointed out to me that the use-by date was yesterday. Under the threat of soon having a rotting chicken on my hands (and in my fridge), I did what I always do at times like this: I called my mom. She is my savior in these situations, and once again she came to the rescue. We talked through the process of seasoning and roasting a chicken and I was suddenly inspired and brave enough to attempt it. It’s really pretty simple.

Once again, my status as a college student lacking exactly appropriate cooking equipment did not hinder the recipe. In my house of five college students none of us owns a roasting pan or rack. Substitution: a 9″ x 13″ cake pan and no rack. It worked quite well. I slightly adapted a recipe from my mom and relied heavily on the results of the Google search “how to roast a chicken.” I also overcame my intense dislike of handling raw meat to prepare the chicken–reaching inside to pull out the giblets and thoroughly rubbing the seasonings into the chicken with my bare hands. It really doesn’t take long to prepare the chicken, then all you have to do is roast it for a couple of hours. You can use that time to prepare side dishes or start your homework from the first day of class :)

It was all worth it, the chicken turned out really well and it was an excellent meal to share with friends. Now you too can roast a chicken.

P.S. Sorry for the delay in posting, but now that classes have started again I hope to post about once a week.

Roasted Chicken

Recipe adapted from Mr. Food Cooks Chicken

Adjust amounts depending on the size of your chicken. My chicken was close to 5 pounds and the recipe below was just right.

1 1/2 -2 tsp paprika
1 1/2 -2 tsp garlic powder
1 1/2 -2 tsp salt
1/2 – 1 tsp pepper
1/2 – 1 tsp seasoned salt
4 tsp vegetable oil
1 whole chicken (about 4 pounds)

Preheat the oven to 375°. In a small bowl, mix together all the spices and oil.

Place the chicken in a roasting pan (or 9″ x 13″ sheet cake pan and on a roasting rack if you have one) and rub the seasoning mixture all over the chicken until it is well coated.

Bake, uncovered, for 1 1/2 – 1 3/4 hours, or until the chicken is done (165° on a meat thermometer inserted into the breast) and the skin is crispy. This site has a table of roasting times based on weight and some other useful tips. Baste every 20-30 minutes with a pastry brush if desired. (I didn’t baste since I don’t own a pastry brush either and it still turned out quite well, with a nice crispy, flavorful skin.)
Watermelon Mint Salad

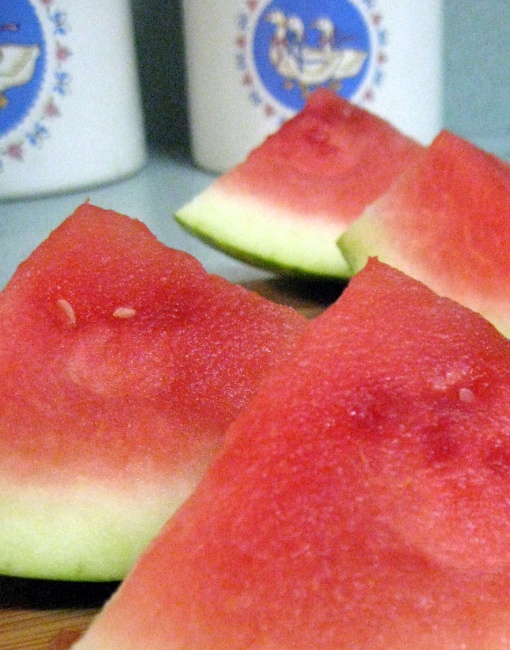
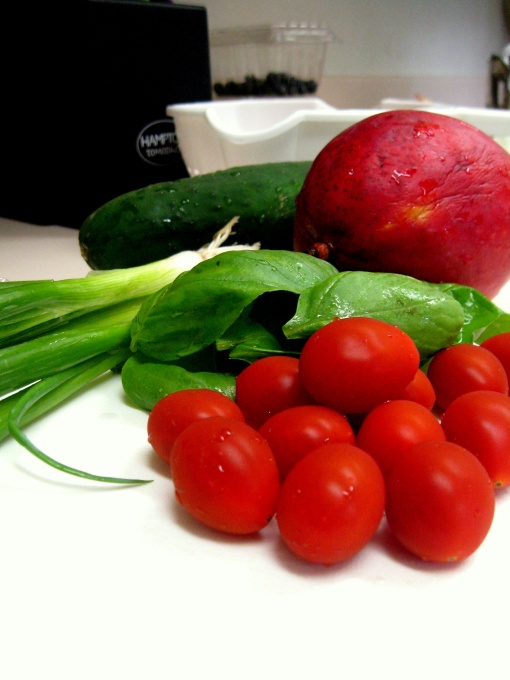
Last Saturday at the farmers’ market I just could not pass up the giant piles of watermelons. We picked out a cute little one and delightedly carried it home. Except that little watermelon didn’t feel so little anymore on the walk home, on a 95° afternoon, stuffed in a huge bag overflowing with zucchini, peaches, tomatoes, and corn. But it was well worth it the sweaty walk home. After a bit of discussion about how to properly cut the watermelon (reminiscent of my near-fiasco with the mango last week), I just went for it and we were rewarded with perfectly juicy red slices of watermelon, one of the best summertime foods.

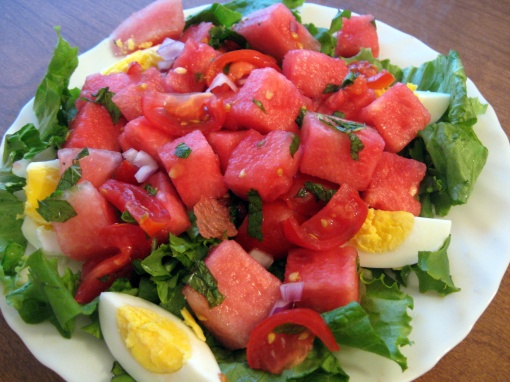
We were further rewarded when Wing found this recipe for a watermelon mint salad. I’d never tried watermelon with mint before, but I was intrigued and was pleased to discover that it is an excellent combination. This salad is full of flavor. I was a little unsure of how the hard-boiled egg would taste, but I ended up loving it. It provides a nice contrast to the juicy watermelon.

This is also simply a beautiful salad. Visually stunning, as Wing said. I love colorful things and this salad is very colorful: rosy red watermelon, crispy green lettuce, shiny purple onions, and soft white and yellow eggs. It works well as a main dish over lettuce, but it’s also good without the lettuce. It’s very easy to adjust the amounts of ingredients to your tastes and the number of people you’re serving. If you’re not particularly fond of raw red onion, I’d cut it down to closer to 1 tablespoon. The number of tomatoes and amount of mint are also easy to adjust, experiment and find out what you like the best.

P.S. Check out my updated About section!

Watermelon Mint Salad

Recipe adapted from Baltic Maid

lettuce, chopped
3 -3 1/2 cups watermelon, cut into cubes
12 cherry tomatoes, halved
1 1/2 – 2 Tbsp finely minced red onion
1 handful fresh mint leaves, cut into small strips
3 hard boiled eggs, quartered

Hard boil three eggs. While they’re cooking, chop the lettuce, watermelon, tomatoes, onions, and mint. Combine all of these ingredients in a large bowl. Divide the salad among individual plates and then add the quartered eggs (they’ll crumble pretty easily if added directly to the salad).

Hawaiian Meatballs

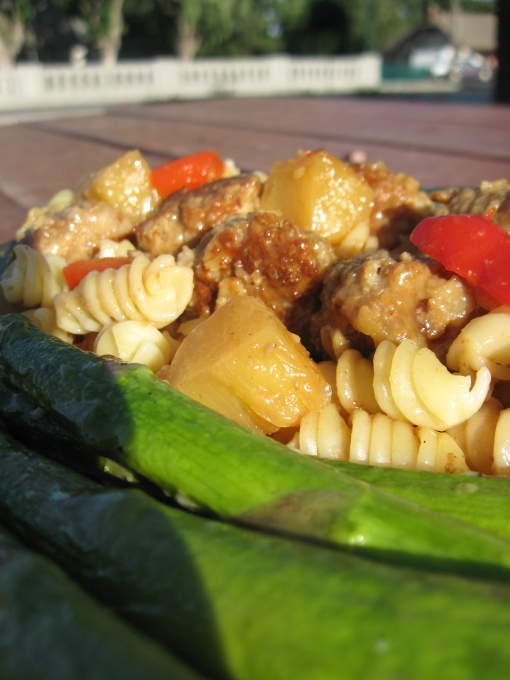
These meatballs are a classic family recipe. Growing up, whenever my mom asked me what I wanted for dinner, without a pause, I would reply “meatballs!” I don’t know that there’s anything particularly Hawaiian about them, other than the fact that pineapple is included in the recipe, but they definitely make an excellent dinner. This is a dependable recipe that’s always good no matter what.

Hawaiian meatballs have become a regular at college as well, I frequently make them when we have friends over for dinner. One recipe can easily feed five or six people and I’ve never met someone who didn’t like them. My friend Michael even got upset when we forgot to invite him over one night when we had meatballs for dinner.

Another reason I like this recipe is that it’s easily adaptable to several substitutions, which is especially nice when you’re in college and you occasionally find yourself without milk or oatmeal and no time to run to the store due to the ridiculous amounts of homework you have to do. You can serve these meatballs over rice or pasta. The vegetables can be switched up too–any color of bell pepper and I even made them with carrots once. Water can easily substitute the milk. And once, in a moment of desperation, I used ground up Wheat Thins in place of the oatmeal. It worked like a charm.

Hawaiian Meatballs

Serves 5-6.

Meatballs

1½ pounds ground turkey or beef
2/3 cup oatmeal or cracker crumbs
1 egg
1 tsp salt
¼ tsp ginger
¼ cup milk

oil

Sauce

2 Tbsp cornstarch
½ cup brown sugar
1 can pineapple, drain and reserve juice
1/3 cup vinegar
1 Tbsp soy sauce
½ cup chopped green (or any color) pepper

In a large bowl, mix together the first 6 ingredients (meat through milk) with your hands. Shape into balls, approximately a tablespoonful for each meatball. Heat enough oil to just cover the bottom of a large skillet. On medium high heat, brown and cook the meatballs through. Remove the meatballs from the skillet and keep them warm while you make the sauce. Pour out any fat from the skillet.

To make the sauce, mix together cornstarch and sugar in a medium sized bowl. Stir in the reserved pineapple juice, vinegar, and soy sauce until it’s smooth (whisking speeds this along). Pour the sauce into the skillet (still on medium heat) and stir it constantly until it thickens and boils. Then boil and stir for about one minute. Add the meatballs, pineapple, and peppers and stir together until heated through.

A Tasty Lentil Salad

I grew up in a land of lentils. Nestled among the softly rolling hills of a region called the Palouse, my hometown grows a third of the nation’s lentils. We are also the proud home of the National Lentil Festival, held at the end of each summer. Back home, the festival is just starting and will continue all weekend. This post is in honor of the Lentil Festival and for my love of my little hometown and its tasty lentils.

This is one of the only times in my life that I’ve missed the Lentil Festival. It was the big event of the summer in a little town like mine (known only for its lentils and the state university that makes up more than half the population); it signified the bittersweet end of summer but meant a weekend of entertainment, delicious food, and catching up with friends before school started the following week.

In the last several years the Lentil Festival has increased in size and popularity. The Friday night street fair now offers the world’s Largest Bowl of Lentil Chili (which holds something like 350 gallons, I believe), a hearty, delicious, and spicy chili that I love. On Saturday morning there’s a parade that travels through all four blocks of downtown and features the festival’s mascot Tase T. Lentil riding the Lentil Express train car. Afterwards, the park downtown has all kinds of activities to keep a person occupied and full of lentils. My personal favorites are the lentil ice cream made by the local ice cream parlor (it’s creamy, crunchy, and nutty) and the sampling portion of the Legendary Lentil Cook-Off. People all across the country (I’m not kidding) send in recipes for this contest. The top six recipes are then tasted by lucky people at the festival like me, who then vote on their favorites. In recent years, as fewer of my friends are in town for the festival, the cook-off has been one of my main motivations to go to the festival. There is always such an interesting assortment of dishes to sample–from tarts and cakes to soups, dips, and salads. You can check out last year’s recipes here.

I’ve always liked lentils and this summer I’ve discovered several easy ways to prepare them. One of my favorites was this lentil salad recipe that I stumbled on the other week. It’s a great salad: summery, full of vegetables, and simple to personalize according to your tastes. It also fed me and my housemate for at least three days :)

A Tasty Lentil Salad

Recipe adapted from Alice Waters’ Lentil Salad

1 cup lentils
1 Tbsp red wine vinegar
salt, to taste
black pepper, to taste
3 Tbsp extra-virgin olive oil
2 -3 Tbsp finely diced shallot
3 Tbsp chopped parsley

optional ingredients
1/2 cup cucumber, chopped
1/4 cup each of carrot, celery, and/or onion: cook in a frying pan in a drizzle of olive oil until tender; cool before adding to the salad
1/4 cup red,orange, or yellow sweet bell pepper: season with a few dashes of sea salt (or regular salt) and let stand for 10-15 minutes (to soften) before adding to the salad
feta cheese for garnish

Sort and rinse the lentils, then place them in a saucepan and cover with water by about 3 inches. Bring to a boil. After it comes to a boil, turn the heat down to a simmer and cook for about 30 minutes, until the lentils are tender. (You can reserve a 1/2 cup of the cooking liquid in case the lentils are stuck together later, but I found I didn’t need to use my reserved cooking liquid.)

Transfer the lentils to a large bowl and then toss with the red wine vinegar, salt, and black pepper. Let the lentils sit about 10 minutes, then add more red wine vinegar, salt, and/or pepper to taste.

In a small bowl, combine the olive oil, shallots, and parsley. Add this mixture to the lentils and toss well. At this point add a little of the reserved cooking liquid if needed to loosen dry or stuck together lentils.

Add optional vegetables and/or garnish with feta. This salad keeps well for a couple of days in the fridge, add feta only at the time of serving to avoid soggy cheese.

Curry Turkey Burgers

At some point during my childhood, my parents began using lean ground turkey in place of ground beef. I know they had good reasons for the switch, but I, in my youthful foolishness (and stubborn dislike of any sort of change, large or small) resisted this change with all my might. I was suspicious of every dish my mom made, always on the lookout for this strange awful new infiltrator called ground turkey. The funniest part about it was that I could hardly even tell the difference between the two. It became a family joke: my mom or dad would ask me at the end of a meal if I’d realized the meatballs were ground turkey and I would be absolutely horrified to hear the truth. I’m pretty sure it was an excellent source of amusement for my parents (as are many things having to do with their youngest daughter).

Anyway, although my younger self would be disappointed in me, I have to say that I no longer have anything against ground turkey. Which would explain why last week found me searching for recipes in which to use the ground turkey breast sitting in my freezer. I stumbled across this recipe and it’s definitely a keeper.

Mango and its cross section

Image via Wikipedia

One of the best parts about these burgers was the slices of mango that we topped them with. Various events last week led to me having an entire lovely day at home–no work, no responsibilities, no nothing. Nothing except dinner to make, which was a task I thoroughly enjoyed. I had the time to find this delicious recipe and a chance to go to the grocery store in the middle of the afternoon when it’s (thankfully) relatively empty. A relatively empty grocery store gave me the perfect opportunity to sniff out the perfect mango for our turkey burgers. And I mean literally sniff it out.

I’d never bought a mango before and I really wanted to get a good, ripe one to eat that same day with dinner. All I had to go on was the fact that I remembered Wing telling me she always finds a good mango by its smell. Well I stood in the produce aisle of my local Super 1 for a good five minutes (it felt like an ETERNITY) squeezing and smelling every mango I could get my hands on. And I didn’t smell a thing. Not. A. Thing. Not even one tiny hint of a ripe mango. I knew that at least one of them HAD to be ripe. So finally, utterly frustrated and sweating and swearing under my breath, I grabbed a yellowy-red, soft to the touch, completely scentless mango and ran.

That evening as Wing and I discussed the proper way to cut up the troublesome mango (we have since attempted to educate ourselves with this allrecipes.com video, but we found it more amusing than helpful), I silently hoped that my scentless mango was ripe. Lucky for me, it was. It was a wonderfully ripe, juicy, and delicious topping to these tasty burgers–well worth those agonizing moments in the grocery store.

Curry Turkey Burgers

Recipe adapted from Natural Noshing, where it was adapted from Rachael Ray

Ingredients

1 1/4 lbs lean ground turkey breast
1 egg, lightly whisked
1/3 cup minced red onion
3 Tbsp finely chopped fresh parsley
1 Tbsp fresh minced ginger
2  minced garlic cloves
1/2 finely chopped red bell pepper
sea salt to taste
1/2 tsp ground cumin
2 Tbsp curry powder

For serving
hamburger buns, toasted
lettuce
slices of fresh mango
slices of red onion
slices of tomato
yogurt dressing, optional
Directions
Combine all burger ingredients in a large bowl (ground turkey through curry powder). Form into 4-5 patties, depending on how large you make them (I made 4 from this amount of meat).
Cook the patties in a little olive oil over medium-high heat, approximately 5-7 minutes, until cooked through.
To serve, add lettuce, tomato, mango, and/or red onion. I used only mango and an easy yogurt dressing and it was DELICIOUS! (yogurt dressing: 1/3 cup plain nonfat yogurt, 2 Tbsp mayonnaise, 1 tsp lemon juice, salt and pepper to taste)

Peanut Chicken Salad

It may have started with pie, but my love of food has definitely expanded beyond the world of desserts and baking. This is mostly because for the last year or so I’ve been living in a real house, not a dorm room, where I can cook real food. In the beginning I a bit nervous (or maybe laziness was involved as well?) and stuck to easy recipes from home. But then, as I was slowly learning to become more adventurous, I discovered food blogs AND my sister introduced me to foodgawker. I was hooked. In love. Now one of my favorite pasttimes is to browse recipes (not to mention admire beautiful photos and discover great new blogs) on foodgawker.

My fascination with cooking has especially increased this summer, since my housemate and I vowed at the beginning of the summer to try to eat well. Eat well as in cook and eat delicious food (and be healthy about it). And I think we’ve done a pretty good job of it. We stuck with our idea of planning each week’s dinners at the beginning of the week and have found lots of tasty, simple recipes (many from foodgawker!) that have become regulars on our dinner list. And this peanut chicken salad is close to the top of that list.

When I first suggested making a chicken salad, my housemate Wing made a face. She loves chicken, but hates salad. But we made this salad again the very next week, mostly because she begged me to. It’s just that delicious. It’s crunchy, salty, and sweet. And so easy!

Sesame oil is the secret ingredient in this recipe. It gives a very distinct flavor to the dressing. I also like to add a splash of sesame oil to the oil that I cook the chicken in. The first time I made this I pan fried boneless, skinless chicken thighs in vegetable oil, with a bit of sesame oil added. It was SO good. The thighs were perhaps an unconventional choice when the desired result was cubes of chicken, but the juicy dark meat was perfect in the salad. It’s also very simple to scale this recipe up or down, depending on how many people you need to feed.

Peanut Chicken Salad

Recipe adapted from Allrecipes.com

Dressing

1/4 cup sugar
1/4 cup cider vinegar
1 1/2 teaspoons sesame oil
1/2 teaspoon salt
Dash pepper

Combine all ingredients in a glass jar with a tightly fitting lid. Shake well until combined. (I usually use about 1/2 to 3/4 of the dressing on the salad.)

Salad

lettuce
2 cups cubed, cooked chicken
1 (15 ounce) can mandarin oranges, drained
1 cup crunchy chow mein noodles
1/2 cup roasted peanuts

Combine ingredients in a large bowl, add the dressing, and toss to coat.

Enter your email address to follow this blog and receive notifications of new posts by email.

Join 8 other subscribers